

As automotive enthusiasts, we constantly seek ways to personalize and enhance our vehicles. One of the most innovative and visually striking methods to achieve this is through car wrapping. Car wrap techniques have gained immense popularity in recent years, allowing drivers to express their individuality while protecting their vehicle’s original paintwork.
Car wraps are not merely an aesthetic choice; they offer a range of practical benefits as well. From vibrant colors and intricate designs to protective layers that shield your car from scratches and UV damage, these wraps serve as both a fashion statement and functional accessory. With an array of materials and finishes available, including matte, gloss, and metallic, achieving your desired look is easier than ever.
In this article, we will explore the various wrap techniques that can transform your car into a true work of art. Whether you’re considering a full vehicle wrap or just accentuating specific features, understanding the benefits and options available will help you make an informed decision. Get ready to revamp your ride and turn heads wherever you go!
Choosing the Right Vinyl Material for Your Car Wrap
Selecting the appropriate vinyl material is crucial for achieving a stunning and durable car wrap. The market offers various types of vinyl, each with unique characteristics that affect the wrap’s aesthetics, longevity, and performance.
Calendered Vinyl is a cost-effective option ideal for flat surfaces and short-term applications. It is less flexible and can be challenging to apply on complex curves, making it better suited for basic designs and older vehicles.
Cast Vinyl is the premium choice for custom wraps. This material is durable, highly conformable, and designed to withstand harsh weather conditions. Cast vinyl is created through a more intricate manufacturing process, which enhances its ability to stretch around curves without distortion, ensuring a flawless finish.
Gloss, Matte, and Satin Finishes are available in both calendered and cast vinyl. Gloss finishes offer a shiny, vibrant look, while matte and satin finishes provide a more subdued, sophisticated appearance. Consider the desired visual effect and maintenance requirements when making your selection, as matte finishes may require special care to maintain their appearance.
Durability and Lifespan are key factors when choosing vinyl. High-quality cast vinyl can last up to 7-10 years, whereas calendered vinyl typically offers a lifespan of 3-5 years. Consider the climate and environment where the vehicle will primarily be driven, as these factors can influence the wrap’s longevity.
Color and Texture options are virtually limitless, allowing for personalization of your vehicle. Glossy, matte, and metallic colors can transform your car’s look. Additionally, some vinyls come with textures like carbon fiber or brushed metal, adding depth and uniqueness to your design.
Before finalizing your choice, it’s advisable to consult with a professional installer who can guide you based on your specific needs. They can provide insights on the best product suited for your vehicle type and aesthetic goals, ensuring you achieve the perfect wrap.
Step-by-Step Guide to Preparing Your Vehicle for Wrapping
Preparing your vehicle for wrapping is crucial to ensure a smooth application and optimal results. Follow this step-by-step guide to get your car ready.
1. Clean the Surface: Start by thoroughly washing your vehicle. Use a mild car soap and water to eliminate dirt, grime, and grease. Pay special attention to the areas around the edges, seams, and places that are prone to collecting contaminants.
2. Decontaminate: After washing, use a clay bar to remove embedded contaminants such as tree sap and industrial fallout that regular washing may miss. This step ensures a smooth surface for the wrap to adhere properly.
3. Dry the Vehicle: Use microfiber towels to dry the vehicle completely. Ensure that no water is trapped in crevices, as moisture can hinder adhesion of the wrap.
4. Inspect for Imperfections: Examine the vehicle for any scratches, dents, or rust spots. Address any imperfections, as these can affect the appearance and durability of the wrap. Sand down rough spots and consider using a filler for deeper imperfections.
5. Remove Accessories: Take off any removable components such as mirrors, door handles, and trim pieces. This facilitates a cleaner application and helps to avoid lifting edges over time.
6. Tape Off Areas: Use painter’s tape to mask off areas you do not want to wrap, such as headlights, taillights, and any other sensitive components. This helps to ensure a precise wrap with clean lines.
7. Apply a Primer or Adhesive: If the vinyl wrap you are using requires a primer or specific adhesive, apply it according to the manufacturer’s instructions. This step can enhance the bond between the wrap and the vehicle surface.
8. Ensure Optimal Temperature: Check the ambient temperature. For best results, ensure that the temperature is within the recommended range for the wrap material, typically between 60°F and 80°F (15°C and 27°C). Proper temperature ensures better adhesion.
9. Gather Tools: Prepare your wrapping tools, which may include a squeegee, utility knife, heat gun, and felt edge. Having everything on hand will streamline the wrapping process.
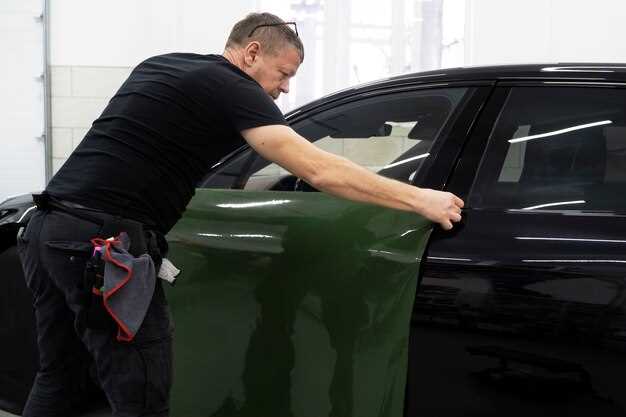
10. Start Wrapping: Once everything is prepped, you can begin the wrapping process. Approach it methodically, taking your time to ensure each section is wrapped evenly and smoothly.
Following these steps will help set the foundation for a successful vehicle wrap that not only looks stunning but also lasts longer.
Best Practices for Applying Car Wrap Without Bubbles
Applying a car wrap can dramatically transform the look of your vehicle, but ensuring a bubble-free finish is crucial for achieving professional results. Here are some best practices to follow:
- Prepare the Surface:
- Thoroughly clean the car’s surface using soap and water to remove dirt and debris.
- Use isopropyl alcohol to eliminate any grease or wax that could interfere with adhesion.
- Ensure the surface is dry and smooth before applying the wrap.
- Temperature Control:
- Apply the wrap in a controlled environment, ideally at temperatures between 60°F (16°C) and 80°F (27°C).
- Use a heat gun to slightly warm the vinyl before application to enhance flexibility and adhesion.
- Use Proper Alignment:
- Start applying the wrap from one end and gradually work towards the other to avoid trapping air.
- Take your time to line up the edges accurately before firmly pressing down.
- Tool Utilization:
- Employ a squeegee to push out air bubbles during the application process.
- Utilize a retractable utility knife for precise cutting without damaging the wrap or vehicle.
- Bubble Removal Techniques:
- If bubbles form, gently lift the vinyl and re-apply while using pressure to smooth out trapped air.
- Puncture small bubbles with a pin or needle and carefully press the vinyl down to release air.
- Final Touches:
- Inspect the wrap thoroughly for any remaining bubbles or imperfections after the application.
- Re-heat the surface again after applying to ensure complete adhesion of the vinyl.
Following these best practices will help ensure that your car wrap application is free of bubbles, providing a sleek and polished appearance that lasts.
DIY Tips for Designing Eye-Catching Wrap Graphics
When creating eye-catching wrap graphics for your vehicle, start by identifying the purpose of the wrap. Determine whether it is for branding, advertising, or personal expression. This will guide your design choices and overall theme.
Next, choose a color palette that is vibrant and complementary. Utilize tools like color wheel apps to find combinations that stand out. High-contrast colors can grab attention while maintaining readability. Ensure that colors reflect the message or brand you want to convey.
Incorporate bold typography that is easily readable from a distance. Choose fonts that align with your theme and ensure they are large enough to be legible after wrapping. Limit the number of different fonts used in the design to maintain a clean and professional look.
Utilize high-resolution images and graphics to prevent pixelation on the wrap. Stock images or custom illustrations can enhance the visual appeal significantly. Ensure that the images you select are relevant to your message and resonate with your audience.
Consider the vehicle’s shape and contours when designing. Create designs that flow with the lines of the car, emphasizing its features rather than hiding them. This will enhance the overall aesthetic and make the wrap more dynamic.
Incorporate your brand logo prominently but tastefully. The logo should be recognizable and placed in strategic locations for maximum visibility. Make sure it is not competing with other elements in the design.
Use design software to visualize the wrap on a 3D model of your vehicle. This helps to see how the graphics will look when applied, allowing for adjustments before printing. Programs like Adobe Illustrator or specific wrap design software can provide valuable insights during this process.
Don’t forget to consider the practical aspects of the wrap, such as durability and removal. Choose materials that are designed for wrapping, as they will withstand weather elements and maintain their appearance over time. Ensure your design accommodates seams and edges to prevent peeling or damage.
Finally, gather feedback from friends or colleagues on your design. Fresh eyes can provide valuable insights and help identify any areas for improvement. This collaborative approach can lead to a more refined and effective final product.
Maintaining Your Car Wrap: Cleaning and Care Instructions
Proper maintenance of your car wrap is essential for preserving its appearance and extending its lifespan. Regular cleaning and care will prevent damage from dirt, grime, and environmental factors.
Start by washing your wrapped vehicle regularly. Use a mild soap solution with warm water to clean the surface. Avoid using high-pressure water systems as they can lift the edges of the wrap or damage the material. Instead, opt for a soft sponge or microfiber cloth to gently wipe down the surface. Rinse thoroughly with clean water to remove all soap residues.
For a more thorough clean, use pH-balanced car wash products specifically designed for vinyl wraps. These products help to avoid any chemicals that could compromise the wrap’s adhesive properties. Always check the label and ensure compatibility with vinyl materials.
When cleaning stubborn stains or contaminants like bird droppings, tree sap, or fuel spills, act quickly. Use a soft, damp cloth and a gentle cleaner to avoid scratching the surface. If necessary, utilize a vinyl-safe adhesive remover for such spots, but always test in a small, inconspicuous area first.
Waxing your car wrap is also beneficial. Use a wax designed for vinyl surfaces to enhance shine and provide a protective layer against UV rays and contaminants. Regular waxing can prevent fading and help maintain vibrancy over time. Avoid using abrasive compounds which may scratch the vinyl.
In addition to cleaning, consider the environment where your vehicle is parked. Parking in the shade or using a car cover can protect the wrap from harsh sunlight and temperature fluctuations, which can cause damage or fading.
Avoid exposing your wrapped vehicle to extreme conditions, especially during the first 48 hours after installation. This allows the wrap to fully adhere to the surface. Additionally, refrain from taking it through automatic car washes with harsh brushes, as they can lift edges and wear down the material.
By following these cleaning and care instructions, you can keep your car wrap looking fresh and striking, preserving its stunning appearance for years to come.
When to Seek Professional Help for Car Wrapping Projects
Car wrapping can be a rewarding project, allowing you to customize your vehicle’s appearance. However, there are specific circumstances where seeking professional assistance is advisable to ensure the best results. Understanding these scenarios can help you avoid costly mistakes and achieve a flawless finish.
One major reason to consider professional help is the complexity of the design. If your wrap involves intricate graphics, multiple colors, or special finishes, professionals have the expertise and specialized equipment to execute these designs accurately. DIY methods may lead to misalignments or visible seams, detracting from the overall look.
Another key factor is the type of vehicle. Luxury or high-end cars often require precision and care that professionals can provide. They are trained to handle the unique curves and contours of premium vehicles, which may be challenging for an amateur. Additionally, high-quality wraps require specific techniques to protect the vehicle’s paint and maintain its value.
The condition of the vehicle’s surface also plays a critical role. If the surface has imperfections, such as scratches, dents, or rust, these can affect the adhesion of the wrap. Professionals can assess the condition of your vehicle and perform necessary repairs or surface preparation to ensure optimal results.
Time is another consideration; a professional installation typically takes less time than a DIY project. If you’re in a hurry, hiring experts can save you from extended downtime. Moreover, they bring efficiency and speed to the process, allowing you to enjoy your newly wrapped car sooner.
| Situation | Recommendation |
|---|---|
| Complex Design | Seek Professional Help |
| High-End Vehicle | Seek Professional Help |
| Poor Surface Condition | Seek Professional Help for Assessment |
| Time Constraints | Seek Professional Help |
| Inexperience | Seek Professional Help |
Inexperience with car wrapping techniques can lead to unsatisfactory results. If you’re unfamiliar with the tools, materials, or processes involved in wrapping, it’s wise to consult professionals. Their expertise can help you achieve a high-quality finish that enhances your vehicle’s appearance.
In summary, while DIY car wrapping can be a fulfilling endeavor, there are specific scenarios where enlisting professional help is crucial. Assess the design complexity, vehicle type, surface condition, time availability, and your level of experience to determine the best course of action for your car wrapping project.